Wednesday 24 October 2012

Every Day


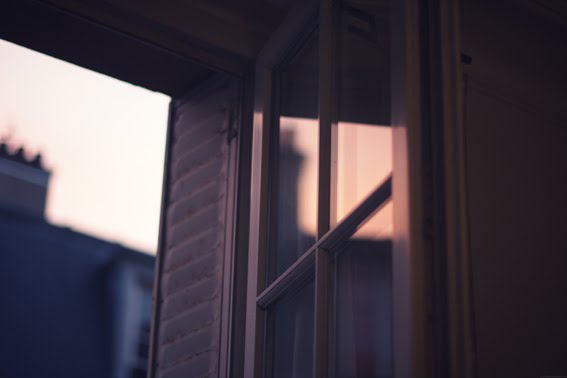
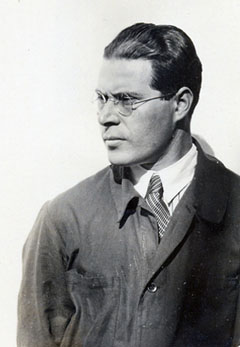
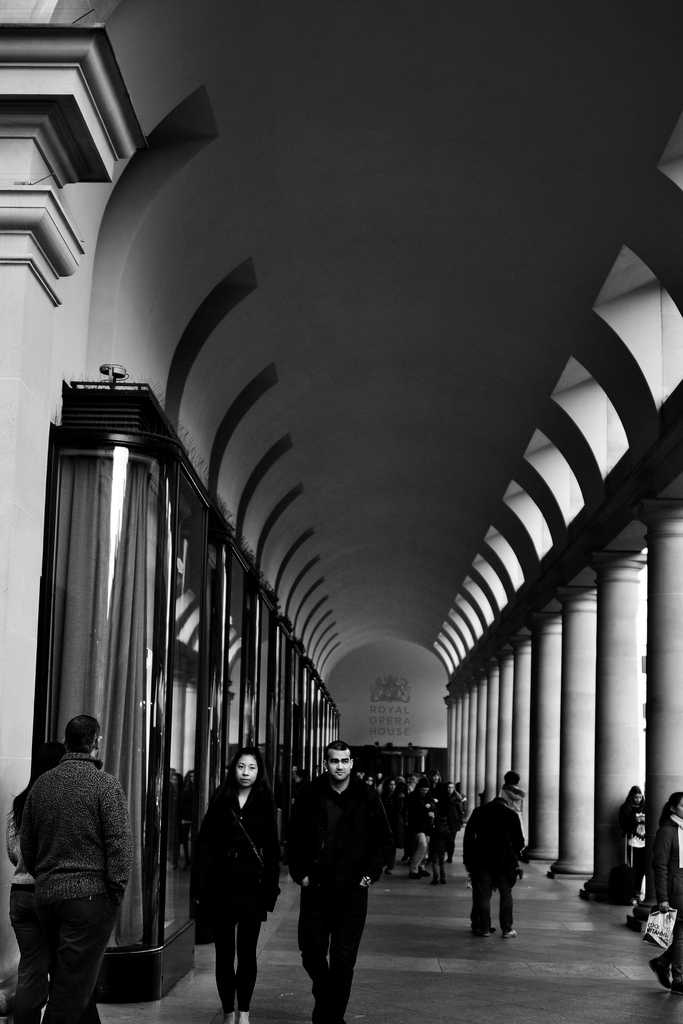
I am happy with the final photos I have chosen for this project. One thing I am happy about with my photos is that I have not had to go out speccifically to take them. The photos I have chosen are the photos I have taken on my own accord throughout my time in owning a DSLR. The photos chosen are taken on both my D3100 and D7000. The fact that these photos have just been me capturing what I see, instead of having to think of things to take, I have captured interesting images in the way that I see them. In this way, I believe that this fits the project better than me going out and taking speccific photos. To be bitterly honest, I don't feel that any of the techniques were beneficial in this project. As nice as double exposures can look, and intricate photoshopping can admittidly look attractive and original, I feel that there is no better way to capture what you see by editing how it is you saw it in your own eyes.  I didn't feel that using techniques such as double exposure would benefit my work in any way. If I were to go back and do more work on every day, I would do more work in London. I would like to stay in London for a whole day, capturing the morning commutes, the evening exporations and everything inbetween.

Friday 19 October 2012


What I Could Take Photos Of For My Project

On the way home from college I go past Croydon quite often and there is a lot of interesting architecture there which I could take photos of. Also, the market end of Croydon could be deemed to be very photographic as well. I could take a photo of the sunset that goes over the bridge at the station near my house. I could also try to take a long exposure near the station where I live.

I've taken photos at my gym before, however it is possible that I could go there again and try and replicate one of my favourite photos on Flickr taken of a female boxer. I am also eager to experiment with smoke and abuse some of my friends that smoke and potentially get some complex swirls and patterns made by the smoke.

I'd like to take an interesting photo of food at one point as well and experiment with composition similar to something I did at GCSE. I could also could try and take a photo of my cat as even though she is hard to take photos of (she always seems to fidget the second I come near her) she is quite photogenic. I believe also I could do further experimentation with composition and lay out some things that I use daily or that I hold important to me. I could be ironic and take photos of some modern day technology with a film camera.

One thing I could also go on to do is experiment with a self portrait if the camera I'm given has a self timer option on it. Seeing as I only have one week to complete this project, I can potentially think of going to London after college one day and taking some interesting photos there.  I could take a photo of a bus, which I did with my Zenit-E that unfortunately did not develop successfully. I took a photo of an empty top deck of a bus, and I thought it looked relatively interesting to the eye. I could think of re-doing this with a camera that actually works.

Even though it seems quite mundane, I can take photos of my every day routine. For example, taking photos of my bed, my tooth brush with tooth paste on it, me on the bus, arriving to college, during college, on my way home, doing work, having a cigarette, eating food, going on the computer and going to sleep. This seems quite plain for the subject of 'every day' as it is really quite straight forward - but if my creative juices cease to get in gear then I could perhaps consider trying to go down the more obvious route. 

Thursday 18 October 2012

What We Did In The Dark Room

In class we experimented the way in which we could develop our pictures. We went through different techniques that we could each individually use to make our pictures look more interesting. When printing a photo you have to put your piece of photographic paper into a tray of developing fluids. These fluids, on contact with your photographic paper, make the image that you've projected; come out. You can experiment with how you apply this fluid and this can make interesting styles and patterns on the paper. For instance, an interesting way in which you can do this is by dipping your hand in the developer and press it on your paper. Something you have to be careful of, which I found out myself, is the strength in which you apply your hand to the paper as sometimes you can have the imprints of the details of your skin on the paper. By doing this, only the area in which you pressed your hand on gets developed. You can also try different ways in doing this, only dipping half of the paper in the developer, using a paintbrush to paint on the fluid etc.

Tuesday 9 October 2012

Lazlo Moholy Nagy


MOHOLY - NAGY

(Ma-holy Nahg)


"Moholy-Nagy played a key role at the Bauhaus in Weimar and Dessau as a painter, graphic artist, teacher, and impassioned advocate of avant-garde photography. He made this image without a camera by placing his hand, a paintbrush, and other objects on a sheet of photographic paper and exposing it to light. While this simple process was practiced by photography's founders in the nineteenth century and was later popularized as a child's amusement, avant-garde artists of the twentieth century revived the photogram technique as a means for exploring the optical and expressive properties of light. With this shadow image of a hand and paintbrush, Moholy-Nagy ambitiously suggests that photography may incorporate, and even transcend, painting as the most vital medium of artistic expression in the modern age." - Metmuseum.net

My take on Moholy Nagy:


His work in my opinion was innovative and not to be doubted revelutionary for the time in which he was doing this work. Nagy's work is often depicted to be child like with some form of meaning behind it, for instance the photo attached above shows a hand clasping a paint brush. This, being in a photo, is a paradoxical theme considering that the paintbrush symbolises painting and manual art, the twist being that this is a photograph of this. This photo was almost a middle finger to the pervious conceptions that art could only be made via the brush, as this photogram theoretically contradicts. Nagy's work was often deemed contravercial as his photographs pushed buttons and provoked reactions from the public. The hungarian who also was also a painter and a teacher was one of the first to publicise photography without cameras, pushing the boundaries of what was thought to be art at the time with new and interesting ways to look at things.


Moholy Nagy - July 20th 1895/ November 24th 1946

Monday 8 October 2012

Bjork Vespertine Inspired Work


We came to the conclusion that this image was made by projecting the a drawing of a swan that had been drawn on a piece of see through tracing paper. By drawing something on a piece of tracing paper and projecting it onto the image below you can achieve a double exposure. The tracing paper is see through and as such you do not see it on photograph below, you only see the drawing as a solid image onto of the photo.
In this photo it is obvious that the swan has been edited on artificially to the photograph. The picture is that of a woman and the outline of a swan on top of it. The class went over different ways in which this photo could have been made and we all came up with different explanations. I, personally, thought that it was photoshop that made this image the way that it was because I assumed that it was not that old of an album.

The symbolism of the swan on this photo seems very obscure. However a swan could have been chosen for a few different reasons, one being that the white swan symbolises purity as the colour white is normally linked with the idea of this. The wings of the bird could also have a hidden meaning of being able to fly, this symbolises freedom that the Bjork may covet or want to achieve in the album. One further reason a swan could have been used potentially is because all swans are owned by the queen and it could be implying a regal theme to the album.  

Sunday 7 October 2012

RONI HORN

   http://1.bp.blogspot.com/_XJgr2rIwdgU/Sw8QpurpCrI/AAAAAAAAAFg/NAGq0LJsSXY/s1600/roni+horn.jpg 

RONI HORN

Born September 25th 1955, Roni Horn has established herself firmly in the world of visual arts as an experimental and unique artist. Her work has spanned the artistic spectrum, ranging from sculpture, drawing, site specific installations and last but not least, photography. Born and raised in New York, she still lives and works there to this day. She received a BFA from the Rhode Island School of Design and a MFA in sculpture from Yale University.


Horn's first photographic installation,You Are The Weather, was a series of photographs where she took over 100 separate pictures of a model whose face was supposed to reflect the weather changes of Iceland, which Horn grew cautious for. I understand this to a point. If the model shows a certain facial change then it is symbolic to the change in the weather. However in my opinion when you are asking the model to give a neutral expression to the camera, how do you expect something so volatile as a human face to accurately reflect the change in the weather. I understand perhaps if she took a photo of a woman clutching her coat to portray the deprivation of sun shine and warmth, but how were one hundred separate photos that in my opinion aren't even that different, supposed to give across her idea? Perhaps I'm not that 'deep' to look further than the fact all of the photos look pretty much the same. Reading the reviews of this installation I am absolutely baffled. 

On a contrasting view, the picture which is positioned at the top of this post I feel is quite interesting. There is something quite interesting about the use of shutter speed on this photography which plays on the innocence of the figure. The erraticness of the smiling clown that causes the blur that gives quite an angry and almost sinister side of the figure which before personifies happiness and fun. There always has been something quite creepy about a clown's constant smile.


How To Make A Contact Sheet


Before you can say how to make a contact sheet, you must be able to know what one is. So, what is a contact sheet? A contact sheet is basically a sheet full of strips of developed film. Some photographers, as I discovered when making this post, have made images via contact sheets. Pretty awesome. Take a look below.
Photographer Mario Zanaria created this contact sheet portrait of a model named Francesca by planning out each of the frames on a roll of film.

"A contact sheet is a positive print of all the negative images from one film, made by a contact printing process so that all the images are the same size as the negative. A contact sheet is a useful way of seeing which are the best images on a film so you can decide which ones to make enlargements from." - Dshed.net

How to make a contact sheet:

Place your safe light on on your enlarger. This will project a square however big, onto the surface below. Place your printing paper on the surface, glossy side up. You will ideally want to be setting the enlarger at F8 and when I was making a contact sheet, I found out that 2.5 seconds was an ideal time for me. Though this could not be an appropriate time for all photos. To find out what the best time is, experiment. Place a sheet of black card over a slide and expose it to light, then move the card up another slide (leaving the slide that was just exposed to be exposed again) and so forth. When exposing your film, assure that the safe filter is removed. If you are having trouble with the film rolling upwards, then press down with a sheet of glass. This is not always the case as it is not always needed, and sometimes glass is known to cause scratches on the film. Once your film strip has been exposed onto the sheet on paper, you develop the paper.

Simple.

(I hope it's as simple as I've explained, at least.)