Thursday 20 September 2012

How To Make Pinhole Camera

How to make: 

Find a cylinder roughly the size and shape of a hot chocolate tin/tin of Smash. 

Paint the inside matte black, to ensure that there are no reflections. Paint the underside of the lid as well. Allow enough time to dry. You may need to paint more than one layer.

Cut a square into the tin three quarters of the way down.

Place a slide of thin metal (aluminum from a baking tray is advisable for ideal thickness to be pierced) on the inside of the tin where the hole is. It is also advised to wear down the surface of the piece of metal to reduce any chance of reflection.

Paint one side of metal strip matte black also.

Pierce a hole through the metal strip with a pin so that light can flood through into your pinhole camera.

Cover the metal strip with a strip of black tape, to keep the hole tight from letting in any unwanted light.

The black tape should be able to be pulled back with ease and be able to be stuck back over the hole to act as a shutter.

How to take:

Place a piece of white paper (glossy side facing the hole) in your 'camera'. Do this in complete darkness!
Close tin, assure that no light is entering tin.
Find what you want to take a photo of.
Place tin on a flat surface.
Pull the tape back for however seconds you feel is right. (An average time is roughly 15/20 seconds dependent on what effect you want to create and what light there is.)
Place the tape back over the hole.
Take into a dark room and develop.

You must assure that the only light entering the camera is that of when you are taking the photo. Otherwise you can ruin your photo and have to do it all over again. 


Wednesday 19 September 2012

https://www.youtube.com/watch?v=Z7kuamHV3og

The Life Of A Pinhole Photographer - Justin Quinnell

Justin Quinnell

http://farm7.staticflickr.com/6196/6159527574_30aaa5e70f_z.jpg


Undoubtedly, Justin Quinnell was an amazing photographer whose ideas and interesting way of looking at the simple day to day perspectives were ground breaking to every photographer's concept of how things can be looked upon. Not only this, Quinnell was teaching people that you don't have to own an expensive heavy camera, own endless pieces of class nor fancy or extravagant flash units. Quinnell was using pin hole cameras for his work: cheap, affordable, basic cameras that worked through  His work arose about twenty years ago, and at the time his pieces were deemed revolutionary. In an interview, Justin revealed that the idea of doing pinhole photography was inspired from when was a child and he had an operation on his eye, leaving him able to only see a small hole through a gap in his eye patch. Though he wasn't the founder of pinhole photography, as he grew older and began to teach at South Bristol college, the idea of doing pinhole photography arose and he taught his class how to use and make them. He claimed that his class were from a less affluent region and couldn't afford fancy cameras, yet could afford countless cans of fizzy drink every day. From then on, he found a passion for pinhole photography and since then has become famous for it. Quinnell had become so famous infact that he's been to Hollywood and back, where his pinhole cameras were featured in the film 'The Brothers Bloom'.  The Bristolian is still taking photos to this day.

My personal take on his work:

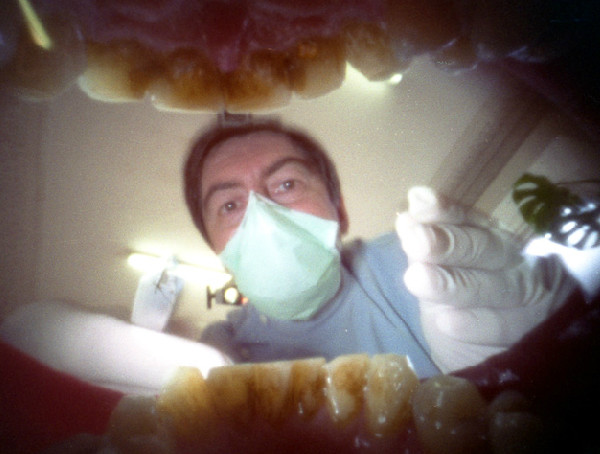
Though it can't be denied that his style of work was indeed revolutionary and unlike anything that I'd covered or seen, some of his work in my opinion becomes quite repetitive and as a photographer and photography student, I like to have some variation in the photos that I take. Pinhole photography was his style and is what has made him well know and renowned, that is not what I became disinterested in. I enjoyed making pinhole cameras, and found the results to be pleasing. However, he has taken picture after picture with a camera in his mouth. I find this boring. At first I felt that the first photo I saw of him doing this (see below) was amazing and fresh; new. The same impression that I can imagine was given on to those who were seeing his work for the first time 20 years ago also. However it was at the point of seeing about 10 photos of a camera stuck in his mouth that my interest wandered. A pinhole photographer that I much rather prefer the work of is that of Steve Irvine. (See bottom)


Tuesday 18 September 2012

Justin Quinnell


Justin Quinnell is the photographer who took this photo. This is 6 month exposure taken of The Clifton Suspension Bridge, Bristol from June 20th 2009 to December 9th 2009. Quinnell completed his photography degree in 1984 and since then has been doing pinhole photography for the past 20 years. He was born in Bristol and went on to work as head of photography at South Bristol College. Since then he has been holding lectures and workshops regularly on pinhole photography, of which he has concentrated. The majority of his work were made for his personal enjoyment but soon after he became recognised for his work, he would hold workshops in which his work would spark imagination and give inspiration to aspiring photographers. We thought that the photo that we whose was interesting and as we are doing pinhole cameras in class, we thought it would be suitable to choose this. More importantly, the main reason that we chose to study him was because we were told to.

Tuesday 11 September 2012

How the Pinhole Camera Works


Today we learned about pinhole cameras and how they worked. Though something so complex as a camera that nowadays is mostly digital and made up of loads of complicated parts and cogs, it was surprising to know that we could make a camera out of something that compared seems so plebeian. You can make a camera not just with magnesium alloy and hard plastic and metal, but with just a tin, a slide of film, and a pin. Well obviously everything started off slightly less developed as it is today. At the moment we haven't yet finished making our pin hole cameras. We all brought in a tin (though mine was slightly mouldy and unable to be used) and painted the inside in a pitch black matte paint. We also painted the bottom of the lid. This was as so there would be no light entering the tin. Most of the tins were reflective on the inside, this was another reason we wanted to use a thick black matte paint to stop there being any reflections, which would completely ruin any photos produced. Once the tins are done drying, we will cut open a small slide for us to place a piece of thin tin (painted black also) that can be easily pierced with a pin. We will place a flap over the top of this hole to act as a shutter. A photo is made due to the shutter and the shutter speed. A very crisp photo is usually due to a very fast shutter speed. A photo where you see the lights blurred and extruded is due to a slower shutter speed. We will place the tin on a flat surface and we will try to keep it as still as possible, this will be acting as a tripod to reduce vibration. We will let the light fill in to the tin for a few seconds, before putting the black flap over again. This is the shutter. The photo will be encapsulated onto the film and be ready to be developed.